 Save
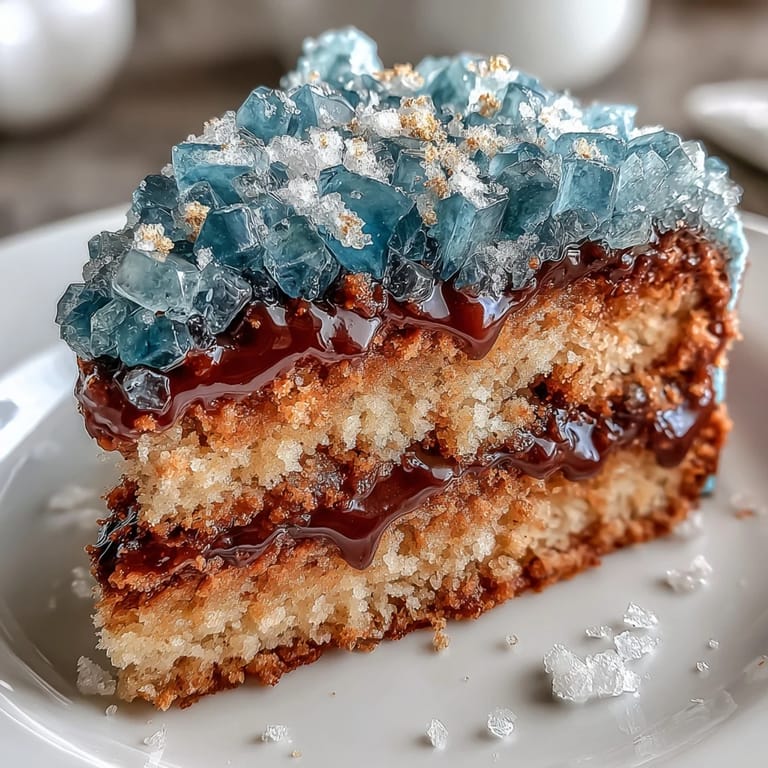
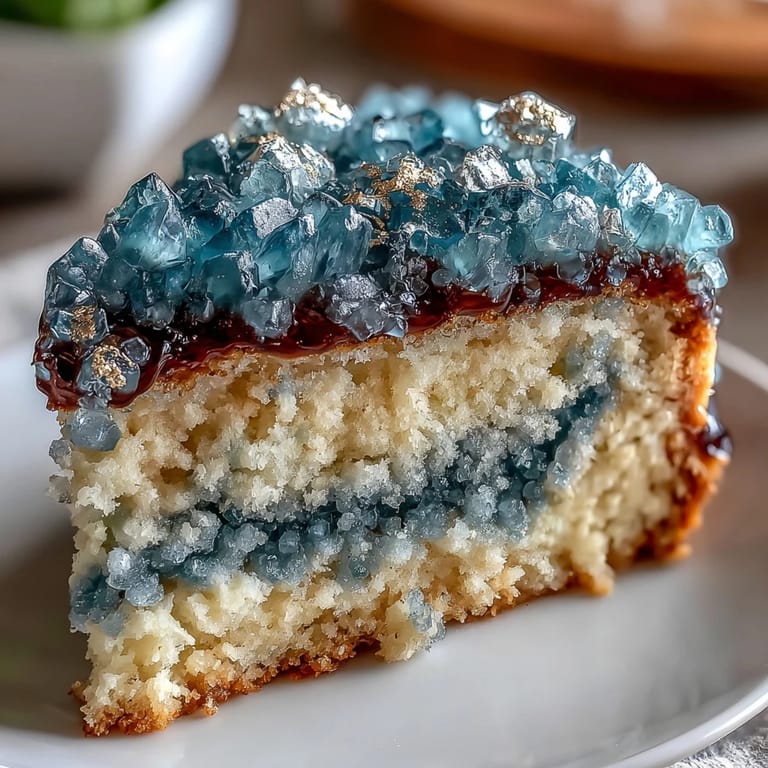
Save The first time I attempted a geode cake, my kitchen felt like a laboratory: sugar crystals everywhere, vivid teal stains dotting my apron, and the scent of vanilla filling the air. I remember how the soft hum of my mixer blended with occasional laughter from the living room, creating a soundtrack of celebration. As I sliced into the cake, the striking teal and gold geode design made everyone pause (and snap photos!), turning dessert into the centerpiece of the graduation party. Nerves gave way to excitement as the shimmering gold leaf glinted under the kitchen lights. Somehow, this cake made a milestone feel truly special.
When my cousin graduated, we gathered in my kitchen, each person assigned a task—my niece mixing buttercream, my aunt counting sugar crystals, and me nervously tracing the geode slice with a sharp knife. We joked about "artistically messy" hands and toasted the baker (me) with sparkling lemonade. The anticipation of the reveal was half the fun, and when our teal geode emerged, everyone cheered.
Ingredients
- All-purpose flour: Use fresh flour for the best structure; sift for an airy crumb.
- Baking powder: Helps the cake rise evenly—double-check its freshness before you bake.
- Salt: Just a pinch balanced the sweetness and boosted flavor.
- Unsalted butter: Room temperature is key for creamy texture—soft but still holds its shape.
- Granulated sugar: Offers classic sweetness; I found sanding it in the butter helps achieve a fluffy base.
- Eggs: Let them sit out for a bit—warm eggs incorporate more easily and give lift.
- Vanilla extract: Go for a good quality vanilla; the aroma becomes the backbone of your cake.
- Whole milk: Adds rich moisture; measure it with care to avoid a dense crumb.
- Powdered sugar: Sift to avoid lumps in your buttercream and create a smooth finish.
- Heavy cream or milk: Adjust for the perfect buttercream spreadability—it’s your ticket to silky swirls.
- Teal gel food coloring: Intensifies color without thinning the mix; start with a tiny bit and build up.
- Rock sugar crystals: Creates the geode effect—clear or white crystals are easiest to dye and arrange.
- Edible gold leaf or gold luster dust: For that magical golden touch; keep your hands dry and use a delicate brush for precise decor.
- Simple syrup: Optional, but brushing layers keeps the cake tender for hours.
Tired of Takeout? 🥡
Get 10 meals you can make faster than delivery arrives. Seriously.
One email. No spam. Unsubscribe anytime.
Instructions
- Mix and Bake the Vanilla Cake:
- Begin by whisking together flour, baking powder, and salt—watch the clouds of flour float! Cream the butter and sugar until pale, then beat in eggs one at a time and add vanilla. Gradually add dry mix and milk, alternating, until you have a thick, velvety batter. Divide into pans, bake until a toothpick comes out clean, and cool completely on racks.
- Whip Up the Buttercream:
- Beat butter to a creamy consistency before gradually adding powdered sugar and vanilla. Add heavy cream as needed for a silky texture; tint most buttercream teal, leaving some uncolored for crumb coating.
- Color the Sugar Crystals:
- Drop teal gel coloring onto rock sugar in a bowl, gently stir, and let it dry on parchment. You'll see the crystals transform—some may cling together, but that's part of the magic.
- Layer and Frost the Cake:
- Trim and level cake layers for stacked perfection; brush with simple syrup if desired. Stack layers with buttercream between, crumb coat with uncolored buttercream, and chill for 20 minutes. Frost all over with teal buttercream, smoothing the sides and top.
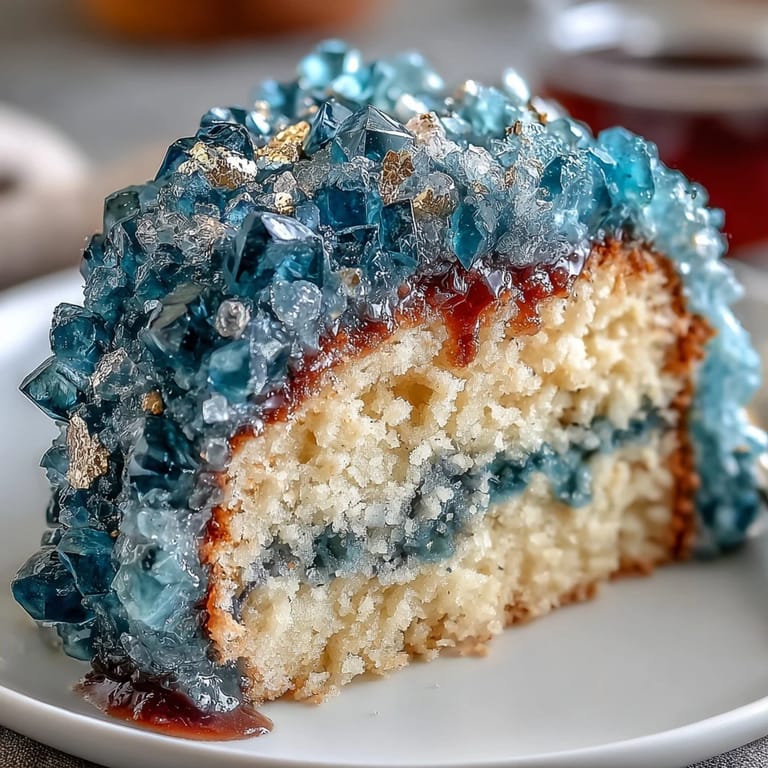
- Carve and Decorate the Geode:
- Use a sharp knife to carefully carve a wedge in the cake, exposing its layers. Spread buttercream inside and press sugar crystals in, using lighter ones in the center and darker ones on the edge. Paint the rim with gold leaf or luster dust mixed with alcohol for dazzling metallic shine.
- Finish and Present:
- Add extra gold accents, situate your graduation topper, and give the cake a final look—spot the geode shine and step back to admire.
 Save
Save There was a moment when the cake sat gleaming on the table, and my grandma tapped the golden geode edge with her fork, grinning at its brilliance. That sparkle seemed to say: "congrats" in edible form. From then on, every celebration felt incomplete without a geode cake in the spotlight.
How to Get That Metallic Gold Shine
Painting with gold leaf or gold luster dust calls for a light hand—if you tap too hard, you'll smudge the delicate crust. Use a clean food-safe brush, and dab gently along the sugar crystal rim for a striking, professional finish. Test on a spare sugar crystal first to practice your stroke.
Choosing Your Teal, Not Just Any Blue
Experimenting with different gel food coloring brands gave me unexpectedly different shades of teal—from pale aquamarine to deep sapphire. Mixing in a touch of blue can shift your geode towards a richer effect. Always start slowly; it's much easier to deepen color than to lighten it after the fact.
Troubleshooting Sugar Crystal Placement
Sometimes the crystals slip or slide down the buttercream, especially if the layer is too thick or warm. I’ve learned to chill the cake quickly if things start getting sticky—it firms the surface and lets you reposition crystals. Arranging from inside out, layer by layer, builds that natural geode pattern.
- If sugar sticks to your hands, use tweezers for precision.
- Sift away sugar dust before painting gold—clean edges sparkle best.
- Let the decorated cake sit in a cool spot before serving for dramatic crystal shine.
 Save
Save May this graduation cake bring applause and smiles wherever it goes. It's not just a dessert—it's a dazzling centerpiece and a memory-maker for every milestone.
Recipe FAQs
- → How do I achieve the teal geode effect?
Color rock sugar crystals with teal gel food coloring and arrange them in the cake's carved wedge, layering lighter and darker shades for depth.
- → What cake flavor works best for this design?
A vanilla sponge provides a neutral base and pairs well with buttercream, but lemon or almond extracts can offer variation.
- → How is the gold accent applied?
Paint the geode's edge with edible gold leaf or brush gold luster dust mixed with clear alcohol for a metallic finish.
- → Can this cake be made vegetarian?
Yes, all main ingredients are vegetarian, including butter, milk, eggs, and gel food coloring. Always check labels for hidden animal products.
- → How many servings does this cake provide?
When made in three 8-inch rounds, the cake yields approximately 16 generous slices, ideal for group celebrations.
- → What tools are needed for assembly?
You'll need an electric mixer, cake pans, offset spatula, parchment, serrated knife, and a food-safe paintbrush for decorating.