 Save
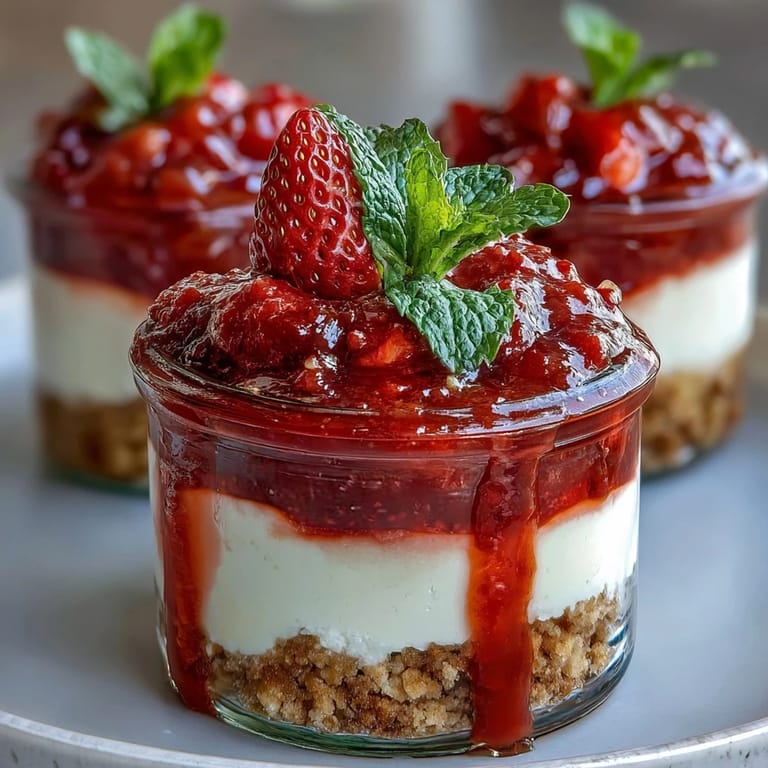
Save Experience the vibrant flavors of spring with these No-Bake Strawberry Cheesecake Jars. Each jar is a delightful layering of buttery graham cracker crust, creamy cheesecake filling, and fresh strawberry compote, making it a perfect individual dessert that’s easy to prepare and celebratory to serve.
Save This dessert not only tastes delicious but also offers a visually appealing treat that impresses guests with minimal effort. The layering in jars keeps each component distinct yet harmoniously balanced, and the chill time allows flavors to meld beautifully.
Ingredients
Tired of Takeout? 🥡
Get 10 meals you can make faster than delivery arrives. Seriously.
One email. No spam. Unsubscribe anytime.
- Base
- 120 g graham crackers or digestive biscuits, crushed
- 50 g unsalted butter, melted
- Cheesecake Layer
- 300 g cream cheese, softened
- 200 ml whipping cream, cold
- 80 g powdered sugar
- 1 tsp vanilla extract
- Zest of 1 lemon
- Strawberry Compote
- 300 g fresh strawberries, hulled and chopped
- 2 tbsp sugar
- 1 tbsp lemon juice
- Garnish
- 6 whole strawberries
- Fresh mint leaves (optional)
Instructions
- 1. Prepare the base
- In a bowl, mix crushed biscuits with melted butter until the texture resembles wet sand. Spoon evenly into the bottoms of 6 clean jars and press down lightly to form a compact layer. Set aside.
- 2. Make the cheesecake layer
- In a large bowl, beat the cream cheese with powdered sugar, vanilla extract, and lemon zest until smooth. In a separate bowl, whip the cold cream to soft peaks, then gently fold it into the cream cheese mixture until fully combined.
- 3. Assemble and chill
- Divide the cheesecake mixture evenly among the jars, spooning it over the biscuit base. Smooth the tops with a spoon. Refrigerate for at least 2 hours to set.
- 4. Prepare the strawberry compote
- In a small saucepan, combine chopped strawberries, sugar, and lemon juice. Cook over medium heat for 5–7 minutes, stirring occasionally, until the strawberries break down and the sauce thickens slightly. Let cool completely.
- 5. Add compote
- Once chilled, spoon the cooled strawberry compote over the cheesecake layer in each jar.
- 6. Garnish and serve
- Garnish each jar with a whole strawberry and a mint leaf, if desired. Serve chilled.
Zusatztipps für die Zubereitung
Prepare the jars in advance and let them chill longer for a firmer texture. Use room temperature cream cheese to avoid lumps and ensure a smooth cheesecake layer. Gently folding the whipped cream maintains its airy texture, giving the cheesecake a light consistency.
Varianten und Anpassungen
For a gluten-free option, substitute the graham crackers with certified gluten-free biscuits. You may also swap strawberries in the compote with raspberries or blueberries to mix flavors and colors, tailoring to seasonal availability or personal preference.
Serviervorschläge
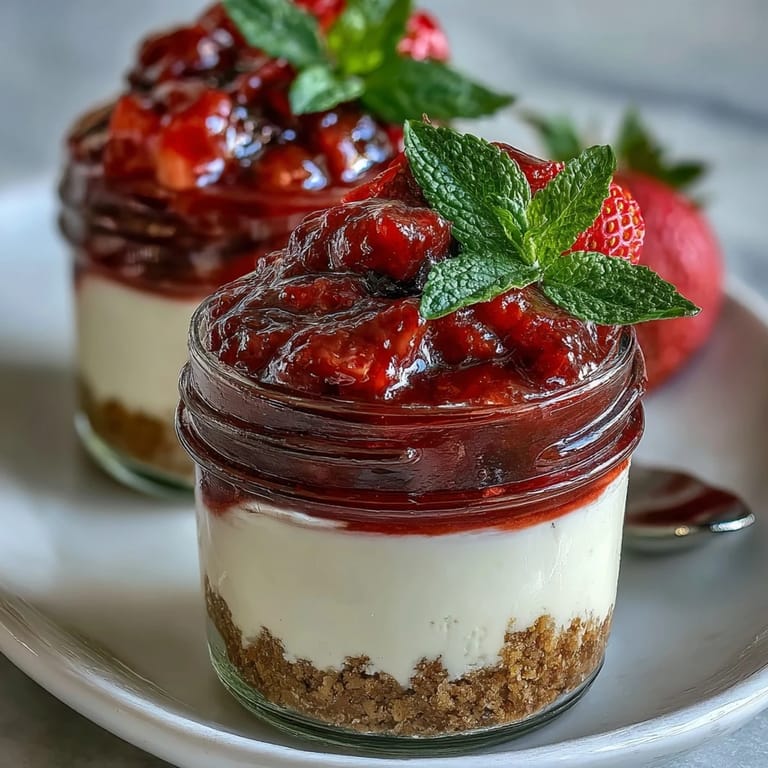
Serve these jars chilled straight from the refrigerator for a refreshing dessert. Garnish with fresh mint leaves and whole strawberries to add a touch of elegance. They are perfect for picnics, spring parties, or as a delightful end to any meal.
 Save
Save With its ease and elegance, this No-Bake Strawberry Cheesecake Jar recipe promises a crowd-pleasing dessert packed with fresh, luscious flavors and a creamy texture. Enjoy the simplicity and beauty of individual servings, perfect for any occasion.
Recipe FAQs
- → How do I achieve a smooth cheesecake layer?
Use softened cream cheese and beat thoroughly with powdered sugar, vanilla, and lemon zest before gently folding in whipped cream.
- → Can I substitute other fruits for strawberries?
Yes, raspberries or blueberries can be used for the compote. Adjust sugar to taste as needed.
- → Is this dessert suitable for gluten-free diets?
Use certified gluten-free biscuits for the base and check other ingredients for allergens.
- → How far in advance can I prepare the jars?
Prepare up to 24 hours ahead. Storing them chilled enhances the flavors and texture.
- → What tools are needed to make this dessert?
Gather small glass jars, mixing bowls, hand or stand mixer, saucepan, and a spoon or spatula.
- → What is the best way to garnish these jars?
Top with a whole strawberry and mint leaves for freshness and visual appeal.