 Save
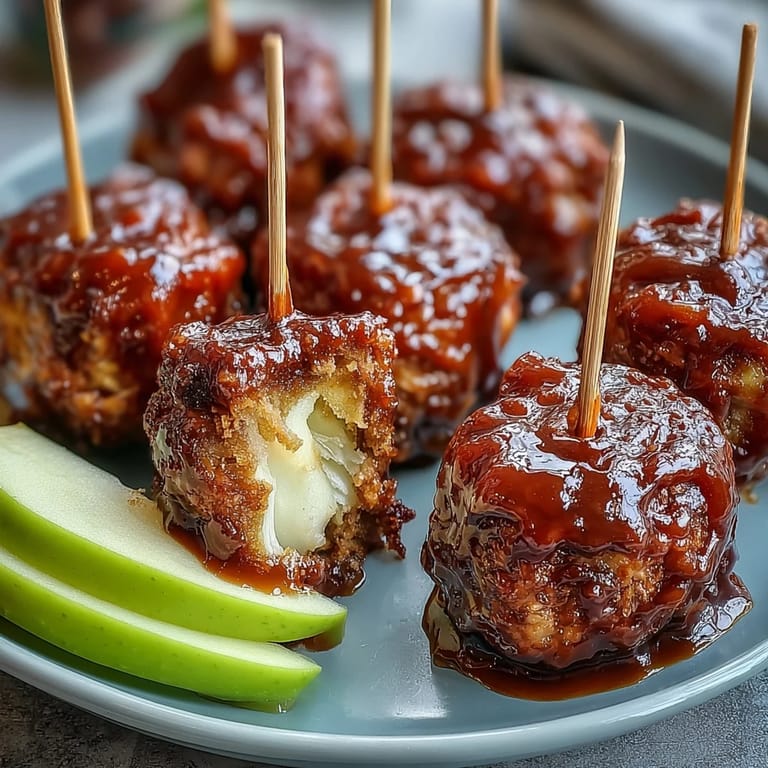
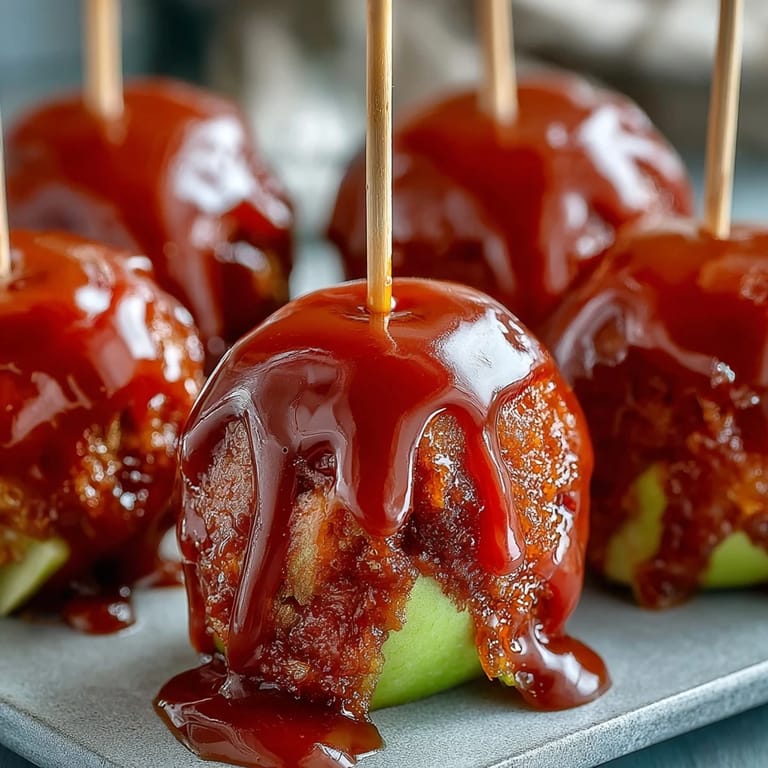
Save My neighbor's daughter was turning seven, and I wanted to bring something that felt special but wouldn't require complicated plating at a backyard party. I grabbed two apples from my kitchen, some sugar, and a box of toothpicks, then spent an afternoon dipping and coating until my fingertips got sticky from the candy work. The moment those little red-glazed bites caught the afternoon light, I knew I'd found the perfect party trick—something that looks like you spent hours in the kitchen but actually takes just thirty minutes total.
Last summer I brought a batch to a book club meeting, expecting them to sit on the snack table while everyone talked. Instead, someone grabbed one, then someone else, and within ten minutes the whole plate had disappeared while I was mid-sentence about chapter three. That's when I realized these little bites had become something I'd make again and again, not because they're fussy, but because they genuinely disappear.
Ingredients
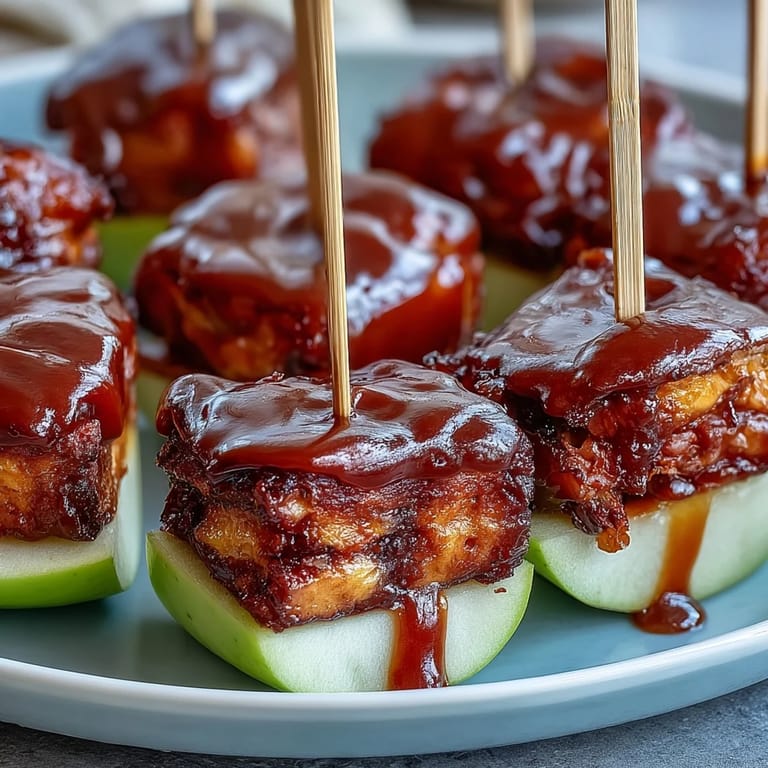
- 2 large crisp apples (Granny Smith or Fuji): The tartness cuts through the sugar and keeps these from becoming cloying—I learned this the hard way with mealy apples that turned mushy.
- 1 cup granulated sugar: This is your base, and it needs to be measured accurately or the whole candy will seize up on you.
- 1/3 cup light corn syrup: This prevents crystallization and gives you that smooth, glossy finish that makes the apples look jewel-like.
- 1/4 cup water: The liquid that brings everything together before it transforms into hard candy.
- 1/4 teaspoon red food coloring: Stir this in after the candy reaches temperature so it doesn't burn—I discovered this after my first batch came out brown.
- Nonstick cooking spray: A light mist on your parchment makes cleanup effortless and prevents sticking.
- Optional toppings (nuts, chocolate chips, sprinkles): These add texture and personality if you want the bites to feel more dressed up.
Tired of Takeout? 🥡
Get 10 meals you can make faster than delivery arrives. Seriously.
One email. No spam. Unsubscribe anytime.
Instructions
- Prepare your station:
- Line a tray with parchment paper and give it a light spray of nonstick coating—this is non-negotiable because hot candy clings like it's holding on for dear life. Having everything ready before you start the candy means you won't be scrambling when things move fast.
- Cut and dry your apples:
- Core your apples, then cut them into rough one-inch chunks and pat them completely dry with paper towels. Moisture is the enemy of candy adhesion, so this step matters more than you'd think.
- Skewer each piece:
- Push a toothpick into each apple chunk and line them up on a clean surface—this makes the actual dipping moment smooth and organized.
- Combine and heat your candy mixture:
- Create the coating:
- Pour sugar, corn syrup, and water into a saucepan and stir until combined, then set it over medium-high heat. Once it starts boiling, stop stirring and let the thermometer do the talking—swirling it around will make the whole thing grainy and crystallized.
- Reach the hard crack stage:
- Watch your candy thermometer like you're waiting for something important because you are. At 300°F, after about seven to eight minutes, the mixture transforms from syrup into the glossy coating you need.
- Add color and work quickly:
- The moment it hits temperature, pull it off the heat and stir in the red food coloring, then start dipping immediately because this stuff hardens fast. Each apple chunk gets a quick swirl in the candy, a moment to let the excess drip off, then straight onto your prepared tray.
- Finish with toppings (optional):
- If you're adding nuts, chocolate chips, or sprinkles, do it right after placing each bite on the tray while the coating is still tacky enough to hold them. Any longer and you'll just be dropping things onto hardened candy.
- Let them cool completely:
- Patience is required here—they need to harden at room temperature before you move or serve them, which takes about thirty minutes depending on your kitchen temperature.
 Save
Save There's something about watching a plate of these disappear that makes you feel like you've done something right, even though the whole process is straightforward and honest. It's the kind of thing that reminds me why I cook—not for complexity, but for those moments when something simple becomes exactly what people needed.
Making Them Ahead for Parties
One of the best discoveries I made was that these can be made the day before and stored in an airtight container at room temperature, which means you can show up to an event without any last-minute scrambling. I usually layer them between parchment strips so they don't stick together, and they hold up beautifully through transport and sitting on a table all afternoon. It's one of those recipes that actually gets easier the more you plan ahead.
Flavor and Color Variations
While the red version is classic, I've experimented with green food coloring for a more elegant look, or sometimes I skip the coloring altogether and love the natural amber-gold of the candy. You can also mix apple varieties in the same batch for visual interest—a mix of red and green apples dipped in clear or amber candy feels a bit more sophisticated. Once you make the basic version a few times, you'll start seeing possibilities everywhere.
Troubleshooting and Storage
If your candy turns out grainy instead of glossy, it usually means you stirred it after it started boiling, so next time just let it be. If it's too thick to dip, you might have let it cool a bit too much—a few seconds back over low heat will loosen it right up. These keep best in an airtight container at room temperature for up to three days, though honestly they rarely last that long.
- Check your candy thermometer accuracy by testing it in boiling water beforehand—an off thermometer ruins everything.
- If you don't have a candy thermometer, you can use the old cold-water test, but it's less reliable and requires more attention.
- Make sure your apples are at room temperature when you dip them so the temperature difference doesn't cause the coating to crack.
 Save
Save These candy apple bites remind me that sometimes the most memorable food doesn't come from long ingredient lists or complicated techniques—it comes from paying attention to one or two things done really well. Make them, share them, and watch people's faces light up when they bite through that crisp candy into tart apple.
Recipe FAQs
- → What type of apples work best for these candy bites?
Crisp varieties like Granny Smith or Fuji provide a firm texture that holds up well under the candy coating.
- → How do I prevent the candy coating from sticking to the tray?
Line your tray with parchment paper sprayed lightly with nonstick cooking spray before placing the coated apple pieces.
- → At what temperature should the candy syrup be boiled?
Boil the sugar syrup to 300°F (hard crack stage) to achieve the proper glossy and crunchy coating.
- → Can I customize the toppings on these bites?
Yes, adding chopped nuts, mini chocolate chips, or sprinkles before the candy coating hardens adds flavor and texture.
- → How should these candy apple bites be stored?
Keep them at room temperature on a flat surface, ensuring they remain dry and the candy coating stays crisp.