 Save
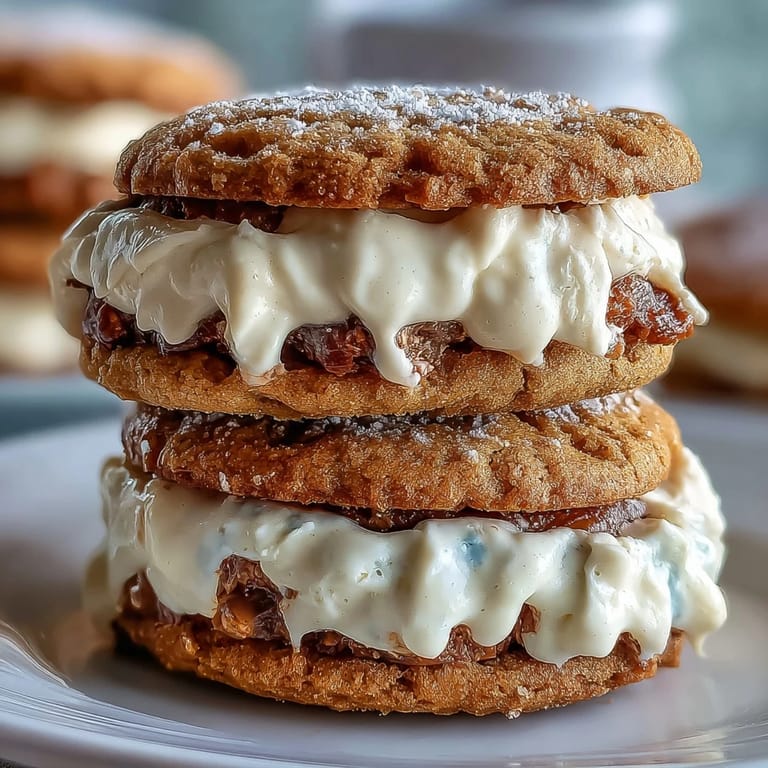
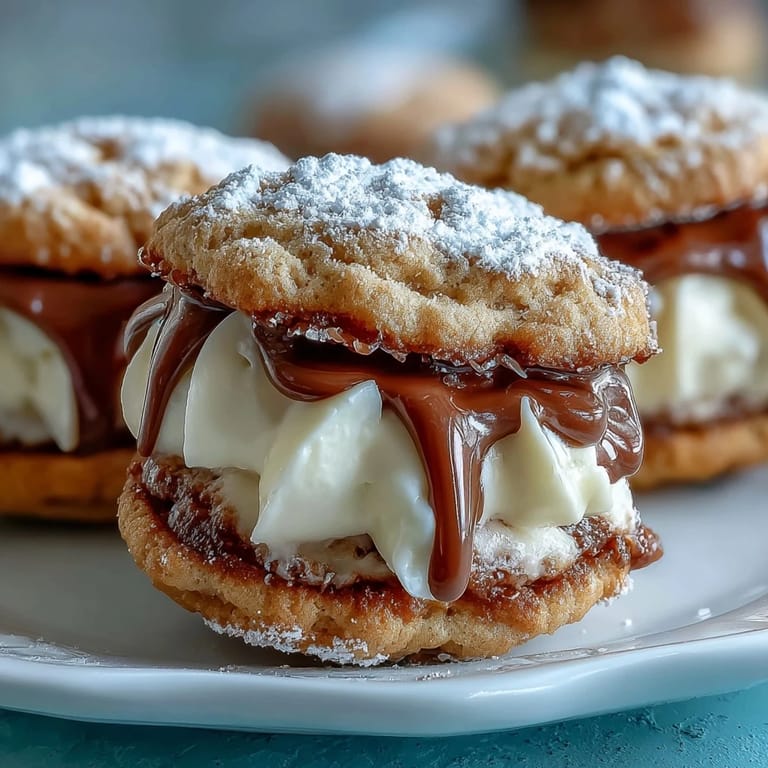
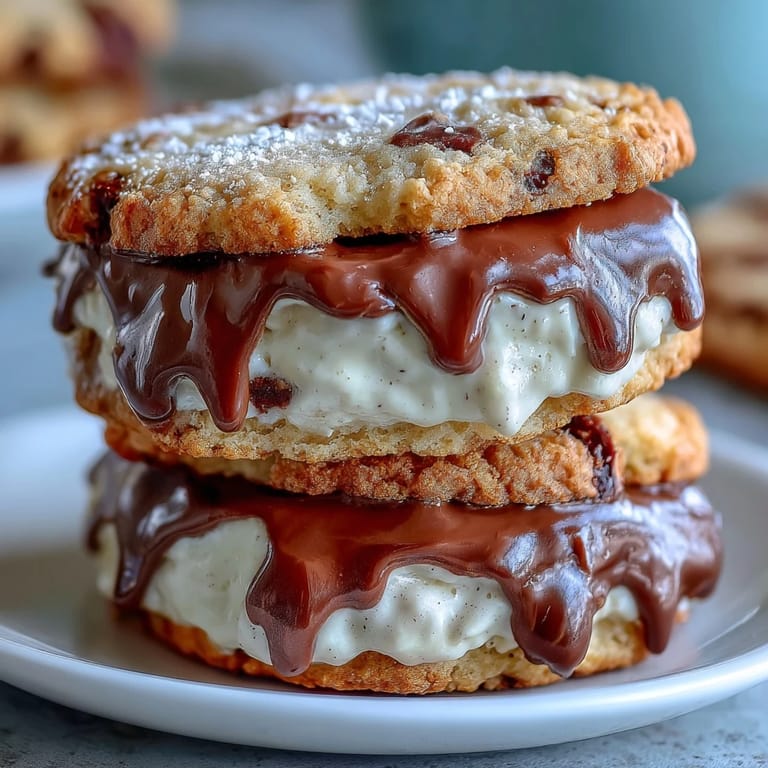
Save My roommate left a Cookie Run Kingdom sticker on the fridge, and somehow that sparked an afternoon of baking delicate sandwich cookies that tasted nothing like what I expected to create. There's something magical about making cookies that look almost too perfect to eat, with their crispy edges and that impossibly smooth vanilla cream nestled between two pale discs. These Milk Cookies reminded me why I fell in love with baking in the first place, not for the Instagram moments but for the quiet satisfaction of getting the texture just right. The whole process takes barely over half an hour, yet it feels like you've accomplished something genuinely special. I've made these at least a dozen times since that first attempt, each batch reminding me that simplicity done well beats complexity every time.
I made these for my neighbor one rainy Sunday morning, and she came back three hours later asking if I'd made extra because she'd already finished the entire box I'd given her. That's when I realized these weren't just pretty cookies, they were genuinely craveable, the kind that disappear faster than you'd think possible. She's since asked me to make them for every gathering, and I don't mind one bit because the process has become a meditation for me.
Ingredients
- All-purpose flour (2 cups): The foundation of these delicate cookies, giving them structure without making them dense or cakey.
- Unsalted butter (1/2 cup for dough, 1/4 cup for filling): Always use unsalted so you control the salt level, and let it soften at room temperature for at least 30 minutes before mixing.
- Granulated sugar (2/3 cup): Creates the slight sweetness and helps achieve that tender crumb texture when creamed properly.
- Large egg (1): Binds everything together and adds moisture without making the cookies spread too thin during baking.
- Milk (2 tbsp for dough, 1 tbsp for filling): A small amount adds richness and keeps the dough tender, distinguishing these from standard butter cookies.
- Vanilla extract (1 tsp for dough, 1 tsp for filling): Use real vanilla if you can, as it makes a noticeable difference in the final flavor profile.
- Baking powder (1/2 tsp): Just enough to give the cookies a gentle lift without making them cake-like.
- Salt (1/4 tsp): Essential for balancing the sweetness and enhancing the vanilla flavor.
- Powdered sugar (1 cup for filling): Sift it first to remove any lumps, which ensures a smooth and spreadable filling.
Tired of Takeout? 🥡
Get 10 meals you can make faster than delivery arrives. Seriously.
One email. No spam. Unsubscribe anytime.
Instructions
- Get your oven ready:
- Preheat to 350°F and line your baking sheets with parchment paper so the cookies bake evenly and don't stick. This small step prevents the bottom edges from browning too quickly.
- Combine the dry ingredients:
- Whisk together flour, baking powder, and salt in a separate bowl, breaking up any lumps in the baking powder. Setting these aside keeps you from overmixing once you add them to the wet ingredients.
- Cream the butter and sugar:
- Beat the softened butter and sugar together for about 2 to 3 minutes until the mixture looks pale and fluffy, almost like clouds. This aerates the dough and is crucial for getting the right texture.
- Add the wet ingredients:
- Mix in the egg, milk, and vanilla extract until everything is combined and smooth. Don't worry if it looks slightly curdled at first, it will come together.
- Bring the dough together:
- Gradually add the dry ingredients to the wet mixture, stirring gently until you have a soft, cohesive dough. Stop as soon as you don't see any streaks of flour.
- Shape the cookies:
- Roll the dough into 1-inch balls and place them about 2 inches apart on your prepared baking sheets. The spacing matters because they'll spread slightly during baking.
- Flatten gently:
- Use your palm or the bottom of a glass to flatten each ball to about 1/4-inch thickness, trying to keep them even so they bake uniformly. A damp palm helps prevent sticking.
- Bake until golden:
- Place in the oven for 10 to 12 minutes, watching for the edges to turn just barely golden while the centers remain pale. Remove them slightly before they look done because they continue to cook on the hot baking sheet.
- Cool completely:
- Let the cookies cool on the baking sheet for a few minutes, then transfer to a wire rack to cool completely before filling. Warm cookies will melt your cream filling, so patience here pays off.
- Make the cream filling:
- Beat the softened butter until smooth, then gradually add the sifted powdered sugar, beating constantly. Add the milk and vanilla and whip until the filling becomes light and fluffy, about 2 minutes of mixing.
- Assemble the sandwiches:
- Spread or pipe about 1 tablespoon of filling onto the flat side of half your cooled cookies, then top with the remaining cookies to create sandwiches. Press gently so the filling spreads slightly but doesn't squeeze out completely.
 Save
Save There was a moment when I was packing these cookies into a gift box for a friend's birthday, carefully nestling them between layers of parchment paper, and I realized I was treating them with the same care someone might use for fine jewelry. That's when these crossed from being just a recipe into becoming something I genuinely wanted to share, a small edible gift that felt personal and thoughtful.
The Secret to Perfect Texture
The difference between cookies that feel delicate and those that feel dense comes down to not overbaking them. I learned this the hard way on my second batch when I left them in for exactly two minutes too long, and while they were still edible, they'd lost that tender quality that makes these special. Now I set a timer for 10 minutes and check them a minute early, pulling them out the moment the edges show any hint of color. The carryover heat finishes the job perfectly.
Playing with Flavors
Once you nail the basic recipe, this is your canvas for experimentation. A friend suggested adding almond extract instead of vanilla, just a half teaspoon, and it transformed the entire flavor profile into something more sophisticated and slightly floral. You could also swap the vanilla in the filling for cream cheese or add a touch of lemon zest to either the cookies or the filling, and each variation still honors the original gentle spirit of the recipe.
Storage and Gifting Ideas
These cookies actually taste better the day after you make them, as the flavors have time to settle and the texture becomes just slightly softer. Keep them in an airtight container away from humidity, and they'll stay fresh and delicious for three full days. I've stacked them in pretty tins, packed them in boxes tied with ribbons, and even mailed them cross-country successfully when I wrapped each sandwich cookie individually in wax paper.
- Try adding a light dusting of powdered sugar to the finished cookies for an extra delicate, snowy appearance.
- If you want more pronounced flavors, add a tiny pinch of almond extract or a touch of lemon zest to the filling.
- These freeze beautifully for up to two weeks, so make a double batch and save some for an easy dessert later.
 Save
Save These milk cookies have become the recipe I turn to when I want to make something that feels celebratory but doesn't require fancy techniques or impossible-to-find ingredients. They're proof that the best desserts are often the simplest ones, made with care and a little bit of joy.
Recipe FAQs
- → How can I ensure cookies stay soft after baking?
Bake just until edges are golden and avoid overbaking to maintain a tender texture. Storing them in an airtight container helps retain softness.
- → Can I add chocolate flavor to the cookies?
Yes, incorporating cocoa powder into the dough adds a rich chocolate twist without altering the texture.
- → What’s the best way to spread the cream filling evenly?
Using a piping bag or a small spoon helps distribute the vanilla cream uniformly between the cookies for neat sandwiches.
- → Are these cookies suitable for vegetarians?
Yes, all ingredients used are vegetarian-friendly, including butter, milk, and eggs.
- → How should I store the cookie sandwiches?
Keep them in an airtight container at room temperature for up to three days to preserve freshness.