 Save
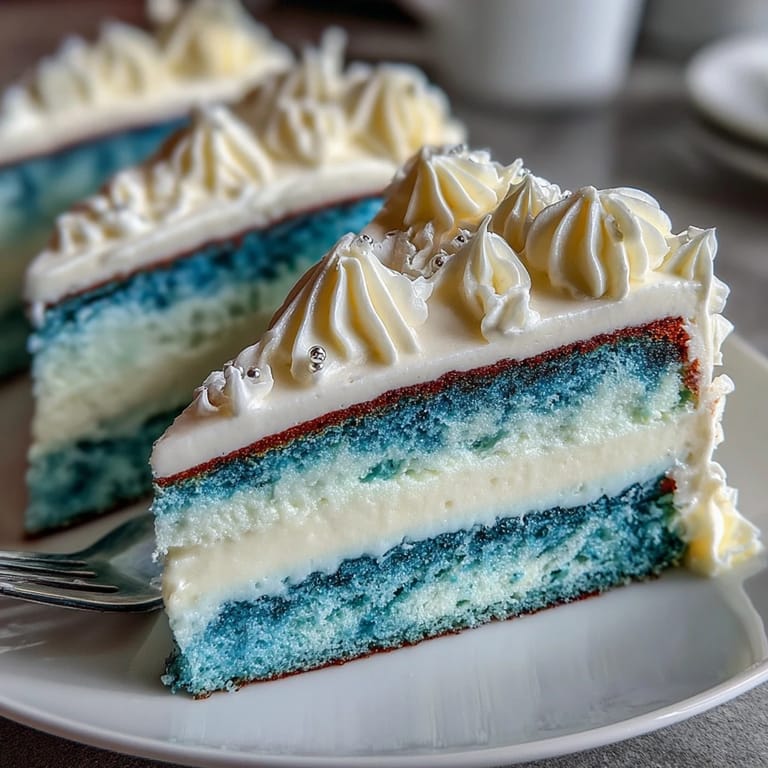
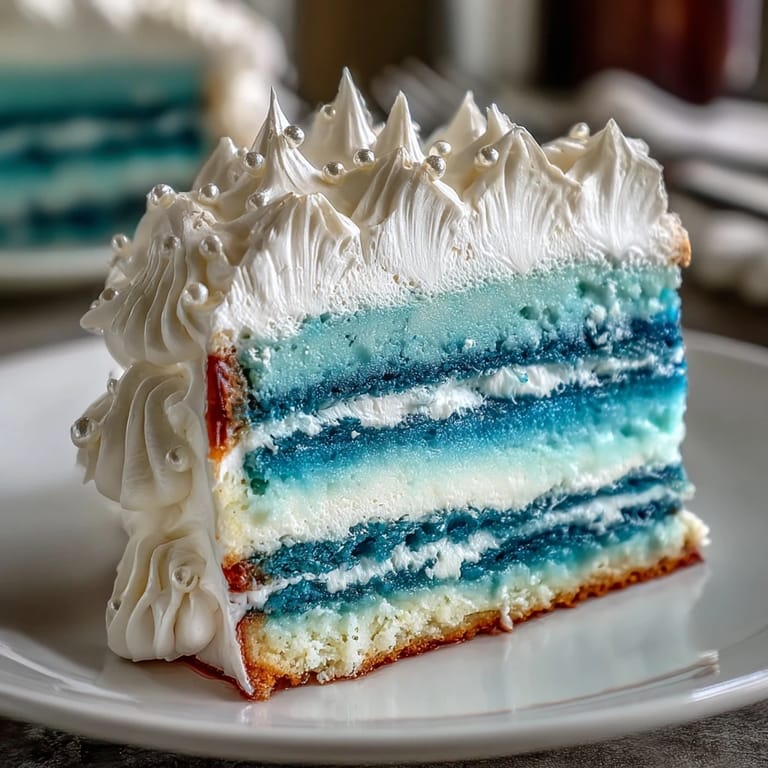
Save My cousin texted me three weeks before her graduation asking if I could bake her cake, and honestly, I panicked a little. She wanted something that captured her school colors in layers, something that would make people say wow when she cut into it. I'd never attempted an ombre cake before, but watching her describe what she envisioned—this gradient of blues fading from deep to light—I realized this was my chance to create something that felt as important as the milestone itself.
The night before serving, I was frosting the cake in my tiny apartment kitchen when my roommate came home and just stopped in the doorway. She watched me blend the buttercream colors across the layers and said, 'That's art,' and suddenly it hit me that this wasn't just dessert—it was going to be the centerpiece of someone's graduation party, a keepsake in photos. That moment made every piping bag mishap and temperature check worth it.
Ingredients
- All-purpose flour (3 1/4 cups): The foundation of a tender crumb; sifting it together with baking powder and salt ensures even rise and no lumps that might interrupt your ombre layers.
- Baking powder (2 1/2 tsp): This is your lift; too little and the cake sits dense, too much and it peaks awkwardly, so measuring carefully matters more than you'd think.
- Unsalted butter and granulated sugar: Creaming them together until pale and fluffy—about three to four minutes—creates tiny air pockets that make the cake light and tender rather than heavy.
- Room temperature eggs (4 large): Cold eggs won't emulsify properly into the butter mixture, leaving you with a separated, grainy batter; set them out while you prep everything else.
- Vanilla extract (1 tbsp): A real vanilla extract adds depth that imitation versions can't match, though imitation works in a pinch.
- Whole milk (1 1/4 cups, room temperature): The alternating method with flour keeps the batter smooth and prevents overdevelopment of gluten, which would make the cake tough.
- Gel food coloring: Gel colors are concentrated and won't thin out your batter like liquid coloring does; you'll need only a toothpick's worth to achieve vibrant ombre layers.
- Egg whites (6 large) and granulated sugar (1 1/2 cups): Swiss meringue buttercream starts over gentle heat to safely cook the eggs, then whips to glossy peaks that hold their shape.
- Unsalted butter cubes (1 1/2 cups, softened): Cold butter won't incorporate smoothly, but butter that's too warm will split the meringue; aim for soft enough to leave an indent when pressed.
Tired of Takeout? 🥡
Get 10 meals you can make faster than delivery arrives. Seriously.
One email. No spam. Unsubscribe anytime.
Instructions
- Prep your pans and preheat:
- Set the oven to 350°F and grease four 8-inch round pans, then line them with parchment paper so the cakes turn out cleanly. Having everything ready before you start mixing means you won't be rushed when dividing the batter.
- Combine your dry ingredients:
- Whisk the flour, baking powder, and salt together in a bowl, breaking up any small lumps of baking powder so the rise is even across all layers. This simple step prevents you from discovering pockets of baking powder in the finished cake.
- Cream the butter and sugar:
- Beat them together on medium speed for three to four minutes until the mixture is pale, fluffy, and noticeably lighter in color. You're incorporating air that will make the cake tender.
- Add eggs one at a time:
- After each egg, beat well until it's fully incorporated before adding the next; this emulsification is what gives the cake its structure. If the mixture looks broken or separated, beat a bit longer and it will come together.
- Mix in vanilla:
- A single tablespoon goes a long way, so use real extract if you can.
- Alternate flour and milk:
- Start with flour, then milk, then flour again, beating just until combined after each addition; overmixing at this stage develops gluten and toughens the crumb. You'll feel the batter come together smoothly if you're patient.
- Divide and tint your batters:
- Pour the batter evenly into four bowls, then add gel coloring to each one in increasing amounts—a tiny dab to the first bowl, a little more to the second, and so on—to create a gradient. Start light; you can always add more color, but you can't take it out.
- Pour into pans and bake:
- Divide the colored batters into your prepared pans, starting with the darkest color on the bottom of your stack order and ending with the lightest on top, then smooth the tops gently. Bake for 22 to 25 minutes until a toothpick inserted in the center comes out clean, and the edges just begin to pull away from the pan.
- Cool the cakes:
- Let them rest in the pans for 10 minutes—this prevents them from breaking—then turn them out onto wire racks to cool completely. Rushing this step leads to fragile layers that crack during frosting.
- Make your Swiss meringue:
- Whisk the egg whites and sugar together in a heatproof bowl set over simmering water, stirring constantly until the sugar completely dissolves and the mixture reaches about 160°F. This cooks the eggs safely while creating a stable foundation for the buttercream.
- Whip to stiff peaks:
- Transfer the warm mixture to a mixer and whip on high speed for about 10 minutes until it forms glossy, stiff peaks and cools down. The volume should roughly triple.
- Incorporate the butter:
- Add softened butter cubes a few at a time, beating well after each addition; the mixture may look broken or grainy for a moment, but keep mixing and it will come together silky and smooth. If it doesn't, the temperature is likely off—either chill it slightly or warm it gently.
- Add vanilla and color:
- Mix in the vanilla, then divide the buttercream and tint portions to match your cake layers if you'd like to blend the colors for a layered effect. Set some aside uncolored for piping accents if desired.
- Trim and layer:
- If any cake layers domed during baking, use a long serrated knife to trim the tops level; this creates stable stacking. Place the darkest layer on your cake stand, spread with buttercream, and repeat with the remaining layers from darkest to lightest.
- Apply the crumb coat:
- Spread a thin layer of buttercream all over the entire cake to seal in any crumbs, then chill it for 20 minutes so this layer sets. This makes your final frosting look polished and professional.
- Frost the final coat:
- Apply your final layer of buttercream, using an offset spatula to blend the colors smoothly across the cake if you're going for an ombre effect, or keeping sections distinct if you prefer bold color blocks. Take your time here; the cake forgives you as you smooth and adjust.
- Decorate and chill:
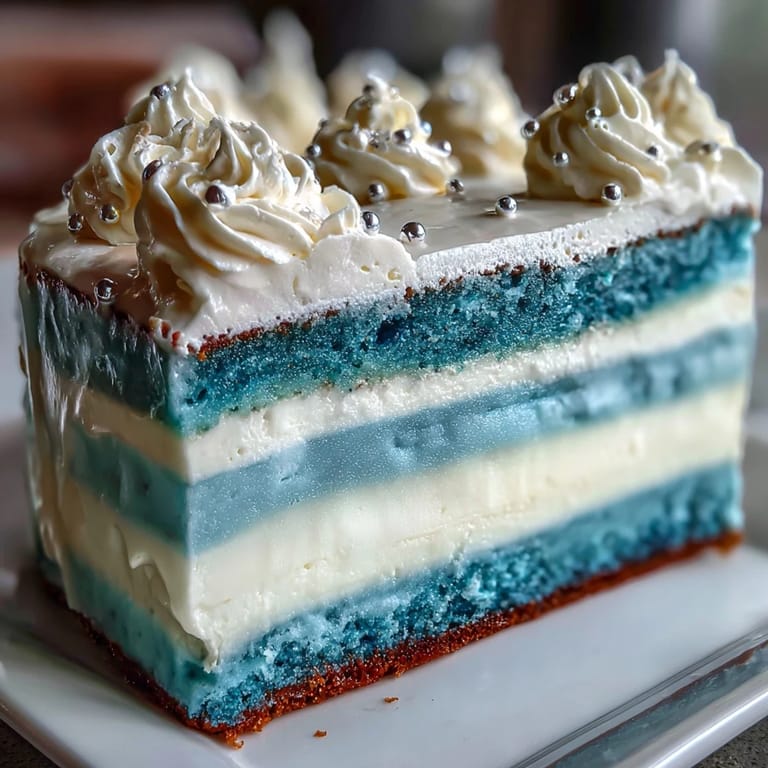
- Add edible pearls, a graduation cap topper, or piped details with any reserved buttercream, then chill the finished cake until the frosting sets firmly. Bring it to room temperature for about 30 minutes before serving so the flavors shine.
 Save
Save At my cousin's graduation party, someone sliced into that cake and the whole table went quiet for a second when they saw the perfect ombre gradient inside. That silence felt like recognition—not just of the cake, but of the moment and the person being celebrated. I've made other cakes since, but that one taught me that sometimes the most rewarding recipes are the ones tied to people and their milestones.
Why Ombre Colors Matter
The beauty of an ombre cake isn't just visual—it's about storytelling through color. When you choose your gradient, you're deciding how the cake will feel the moment it's cut. A fade from deep navy to pale blue feels elegant and calm, while a bold red-to-pink transition feels celebratory and joyful. I've learned that the colors you pick often matter more to the person you're baking for than the flavor does, because every slice becomes a small art object they'll photograph and share.
The Swiss Meringue Advantage
Swiss meringue buttercream used to intimidate me until I realized it's actually the most forgiving frosting once you understand the temperature game. Unlike American buttercream, which can feel grainy or greasy in warm rooms, this version stays silky and stable because the eggs are cooked, so you don't have to worry about food safety or the buttercream breaking down during a summer celebration. It also pipes beautifully and holds detail, which means your graduation cap topper sits perfectly without sliding.
Timing and Make-Ahead Options
The beauty of this cake is that you can build it over two days without stress. Bake the layers a day ahead, wrap them individually in plastic wrap, and keep them at room temperature; make the buttercream the morning of serving and frost the cake no more than a few hours before guests arrive so the frosting stays fresh and the colors stay vivid. If you need to assemble it completely the day before, chill it and bring it to room temperature slowly before serving—this protects the frosting from sweating or slipping.
- Cakes freeze beautifully unfrosted for up to two weeks, so you can bake them early if life gets hectic.
- Swiss meringue buttercream also freezes well in an airtight container for up to a month; thaw it overnight in the fridge and re-whip gently before using.
- The decorated cake keeps fresh, refrigerated and covered, for up to three days, though flavor and texture peak on day one.
 Save
Save This cake taught me that celebration-worthy desserts don't have to be complicated—they just have to be made with intention for someone who matters. Every time you bake it, you'll create your own memory wrapped in buttercream and color.
Recipe FAQs
- → How do I achieve the ombre effect in the layers?
Divide the batter into portions and tint each with increasing amounts of gel food coloring. This creates a smooth color gradient when baked.
- → What makes Swiss meringue buttercream different?
It’s made by gently heating egg whites and sugar before whipping, resulting in a silky, stable buttercream that’s less sweet and melts smoothly on the tongue.
- → Can this layered cake be prepared in advance?
Yes, the cake layers and buttercream can be made ahead and assembled later. Chill the assembled cake to set layers properly before decorating.
- → How to ensure the layers bake evenly?
Use four equally sized pans and pour batter evenly. Bake at a consistent 350°F and test doneness with a toothpick before removing.
- → What decorations enhance the final presentation?
Edible pearls, themed toppers like graduation caps, and piped buttercream details add festive, elegant touches to the cake.