 Save
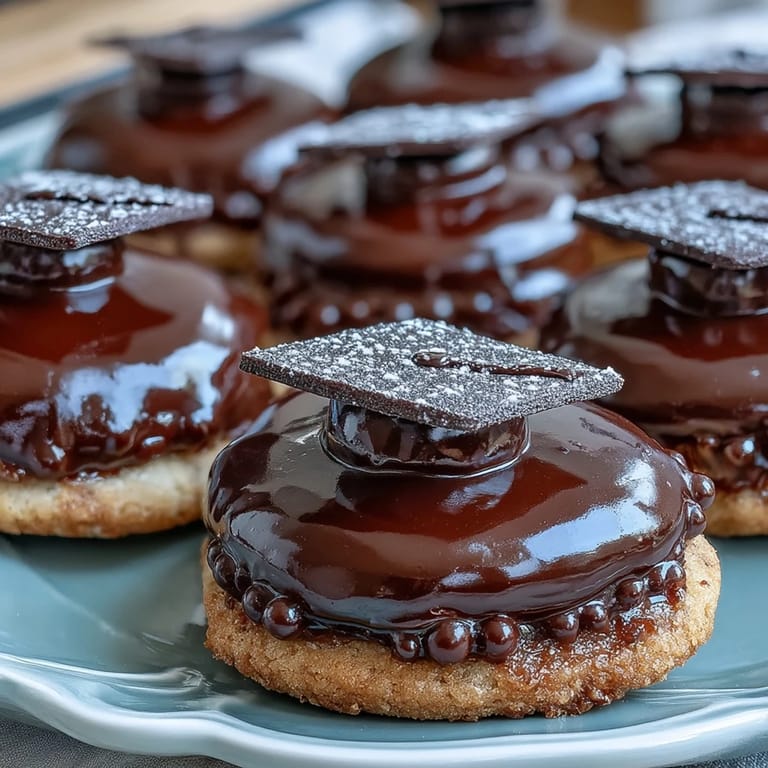
Save My cousin texted me three weeks before her graduation asking if I could make something special for her celebration dinner. I found myself scrolling through cookie decorating videos at midnight, mesmerized by these tiny edible graduation caps with perfect black icing and golden tassels. By the time I actually made them, I'd convinced myself they were far more complicated than they turned out to be, which made that first batch feel like a genuine victory in the kitchen.
I'll never forget watching my cousin's face when she saw the cookie box at her party. She picked one up so carefully, like it might break, then laughed because it was actually delicious and not just pretty decoration. Three guests asked for the recipe before dessert was even finished.
Ingredients
- All-purpose flour (2 1/2 cups): This is your foundation, and measuring by weight if you have a scale makes a real difference in texture consistency.
- Unsalted butter (3/4 cup, softened): Cold butter won't cream properly, so leave it on the counter for about an hour before you start, or your arms will get tired and the sugar won't incorporate right.
- Granulated sugar (1 cup): This sweetens the dough and creates that tender crumb that makes people pause mid-bite.
- Large egg (1): Room temperature works best, though I've forgotten this rule many times and things still turned out fine.
- Vanilla extract (2 teaspoons for dough): Use real vanilla if you can taste the difference; if not, imitation works just as well and costs less.
- Baking powder (1/2 teaspoon) and salt (1/4 teaspoon): These tiny amounts lift and balance the sweetness without announcing themselves.
- Powdered sugar (3 cups, sifted): Sifting actually matters here because lumps in royal icing are impossible to hide.
- Egg whites (2 large) or meringue powder (4 tablespoons) plus water (6 tablespoons): Use meringue powder if you're nervous about raw eggs, and it works just as beautifully.
- Vanilla extract (1/2 teaspoon for icing): A different amount than the dough, so don't mix them up like I did once.
- Black and yellow gel food coloring: Gel colors don't thin out your icing like liquid colors do, which keeps your consistency perfect.
- Mini yellow M&Ms or candy pearls: These become the tiny tassels and make each cap feel celebratory and complete.
Tired of Takeout? 🥡
Get 10 meals you can make faster than delivery arrives. Seriously.
One email. No spam. Unsubscribe anytime.
Instructions
- Whisk your dry ingredients together:
- Combine flour, baking powder, and salt in one bowl so everything distributes evenly through the dough. This takes two minutes but saves you from streaky cookies.
- Cream butter and sugar until fluffy:
- Beat them together for two to three minutes until the mixture looks pale and airy, like you're incorporating tiny air bubbles that will make the cookies tender. This is worth the full time even though it feels long.
- Add egg and vanilla, then mix:
- Scrape down the bowl as you go because butter likes to hide in the corners. Once everything looks smooth, you're ready for the flour.
- Bring the dough together gently:
- Add your flour mixture slowly, stirring just until no white streaks remain. Overmixing makes cookies tough, so resist the urge to beat it into submission.
- Chill your dough:
- Divide it in half, shape each into a disk, wrap in plastic, and refrigerate for 30 minutes. Cold dough is easier to roll and won't spread into weird shapes in the oven.
- Preheat and roll:
- While dough chills, set your oven to 350°F. Roll dough between two pieces of parchment paper to a quarter-inch thickness, which keeps everything tidy.
- Cut out graduation cap shapes:
- Use a graduation cap cutter if you can find one, or a small square cutter works just fine. Place cookies on parchment-lined sheets, leaving a little space between each one.
- Bake until the edges turn golden:
- Eight to ten minutes is perfect; the centers should still look slightly pale. Cookies continue cooking on the hot pan, so pull them out while they seem just barely done.
- Make royal icing with egg whites or meringue powder:
- Beat until foamy first, then gradually add powdered sugar until stiff peaks form, which takes about five minutes and makes your arm work but is completely worth it. Vanilla goes in last.
- Divide and color your icing:
- Most goes black for the cap, a small portion stays yellow for the tassel. Gel coloring means you control consistency perfectly.
- Adjust your icing consistency:
- For flooding (covering the whole cookie), add water teaspoon by teaspoon until it flows smoothly. For piping details, keep it stiffer by adding more powdered sugar.
- Outline and flood with black icing:
- Use a toothpick to guide the icing to the edges, then let it set for 30 to 60 minutes until it's completely dry. This is when you can step away and make tea.
- Pipe yellow tassels and buttons:
- Using a piping bag with a small round tip, add a curved tassel line and a tiny button at the corner of each black cap. Imperfect lines look charming, not sloppy.
- Place your candy pearls or M&Ms:
- Stick one at the end of each tassel while the yellow icing is still slightly tacky, so it holds. This detail makes them look like real graduation caps.
- Let everything dry completely:
- Several hours or overnight is ideal before serving or packaging. Fully dry cookies are sturdy enough to handle without smudging.
 Save
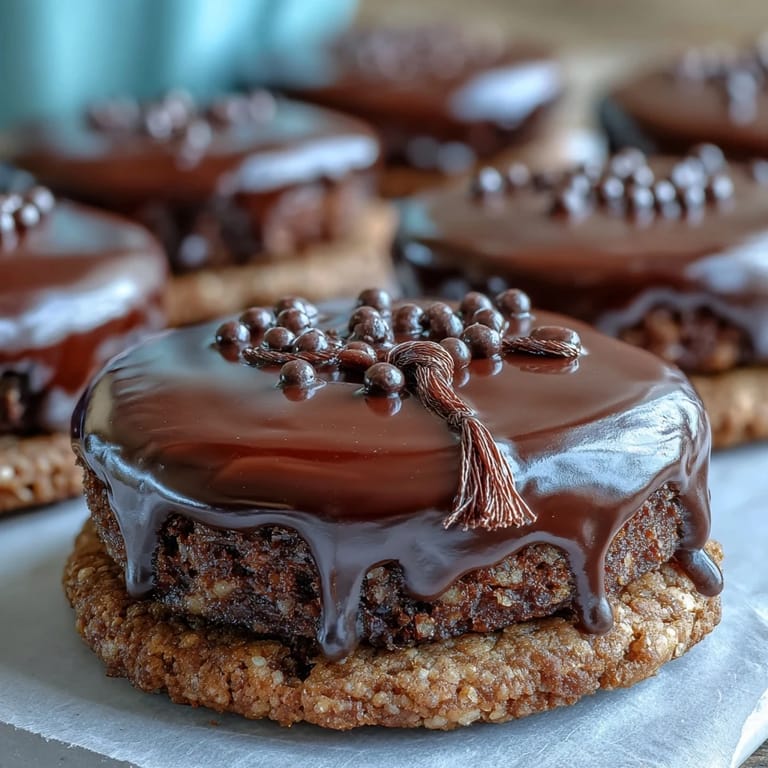
Save There's something magical about turning simple butter cookies into tiny works of art that celebrate someone's achievement. These cookies become keepsakes people actually eat, which somehow makes them more meaningful than anything that just sits on a shelf.
The Best Time to Bake These
Make the cookies two days before your event if possible, which gives you breathing room for decorating without rushing. I learned this when I tried to bake, ice, and serve on the same day and ended up decorating at 11 PM, which works but makes the experience less fun. Separating these tasks means you can take your time with the icing details and actually enjoy creating them instead of treating it like an assembly line.
Decorating Without Stress
If piping details intimidates you, remember that imperfect graduation caps still look intentional and charming. I once had a batch where my tassels looked a bit wobbly, and someone complimented them as artistic. Store-bought royal icing is genuinely good these days if you want to skip the egg white step entirely, which means more time to actually decorate rather than mixing.
Storing and Sharing Your Cookies
Fully decorated cookies stay fresh in an airtight container for up to a week, though they rarely last that long. Pack them carefully in boxes with parchment between layers so they don't stick together or get damaged during transport.
- Let icing dry completely before stacking or they'll smudge and lose their sharp details.
- If you're shipping them, pad the box generously because these are precious and deserve to arrive perfect.
- Take a photo before you give them away because people will definitely ask for the recipe after they taste them.
 Save
Save These cookies turn a celebration into something edible and memorable, which is probably why I've made them three times now for different graduates in my life. Each batch feels like a small gift wrapped in butter and sugar, topped with the sweetness of someone's big moment.
Recipe FAQs
- → How do I achieve smooth royal icing for decorating?
Beat egg whites and powdered sugar until glossy peaks form, then adjust consistency by adding water teaspoon by teaspoon for flooding or more sugar for piping details.
- → Can I prepare the dough ahead of time?
Yes, dough can be shaped and chilled for 30 minutes or frozen for quicker preparation on baking day.
- → What is the best way to prevent cookies from spreading while baking?
Chilling the dough before rolling and cutting helps maintain shape and prevents excessive spreading during baking.
- → How do I create the yellow tassels on the caps?
Use tinted yellow icing piped carefully with a small round tip, then add mini M&Ms or candy pearls to finish the tassel appearance.
- → Are there alternatives to gel food coloring for natural hues?
You can swap gel colors with natural alternatives like turmeric for yellow or activated charcoal for black to achieve vibrant decorations.