 Save
Save Last November, my kitchen smelled like cinnamon and burnt sugar for three straight days. I had decided at the last minute to bring pies to Thanksgiving dinner, which meant learning to make crust from scratch at 11pm the night before. The first attempt stuck to the counter in patches, the second had too much water and turned tough, but by the third try something clicked. There is a particular satisfaction when you pull a golden, bubbling pie from the oven and realize you made that happen.
My grandmother never used a recipe for apple pie. She would slice apples directly into the crust, shake in some sugar from a cupped hand, sprinkle cinnamon until it looked right, and somehow it was always perfect. I spent years trying to capture that intuitive style, burning enough filling to understand why she bothered with measurements. Now I have this written down, but I still think of her every time I peel apples.
Ingredients
- All-purpose flour: Provides the structure for both crust and filling thickener. I have found that unbleached flour gives a slightly more tender result.
- Cold butter: The absolute most important ingredient. If your butter warms up, you lose the flaky layers that make pie crust worth the effort.
- Ice water: Keeps the butter from melting while you work the dough. Add it gradually, you might need less than called for.
- Mixed apples: Granny Smiths hold their shape and provide tartness, Honeycrisps bring sweetness and break down slightly to create that saucy texture.
- Both white and brown sugar: White sugar gives crispness, brown sugar adds depth and helps the filling thicken nicely.
- Lemon juice: A small amount makes all the difference in brightening the apple flavor and preventing browning.
Tired of Takeout? 🥡
Get 10 meals you can make faster than delivery arrives. Seriously.
One email. No spam. Unsubscribe anytime.
Instructions
- Prepare the crust dough:
- Whisk flour, salt, and sugar in a large bowl. Cut in cold butter until the mixture looks like coarse crumbs with some pea-sized pieces remaining. Sprinkle ice water over top, stirring gently with a fork just until the dough holds together when squeezed. Divide in half, form into disks, wrap tightly, and refrigerate for at least one hour.
- Make the apple filling:
- Peel, core, and slice apples into even quarter-inch pieces. Toss them in a large bowl with both sugars, cinnamon, nutmeg, salt, flour, and lemon juice until every slice is coated. Let it sit while you roll out the crust, which helps draw out some moisture and concentrate the flavors.
- Assemble your pie:
- Roll one dough disk on a floured surface until it is about twelve inches across. Carefully transfer it to your pie dish, letting the edges hang over. Pour in the apple filling and arrange it in a slight mound in the center. Dot the top with small pieces of the cold butter.
- Add the top crust:
- Roll out the second disk and place it over the filling. Trim the excess dough, then fold the top edge under the bottom crust and crimp it together with your fingers or a fork. Cut four or five slits in the top to let steam escape during baking.
- Finish and bake:
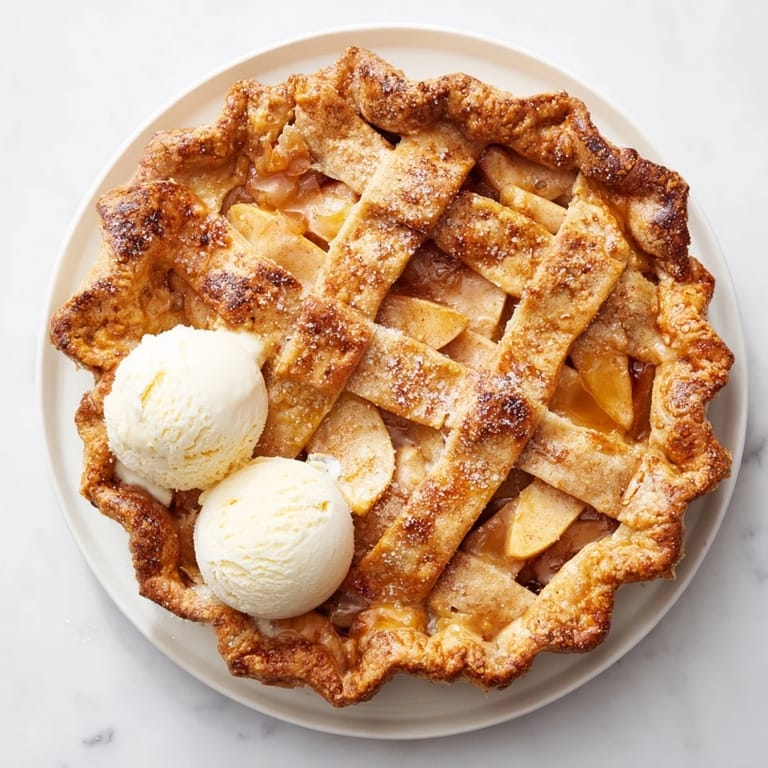
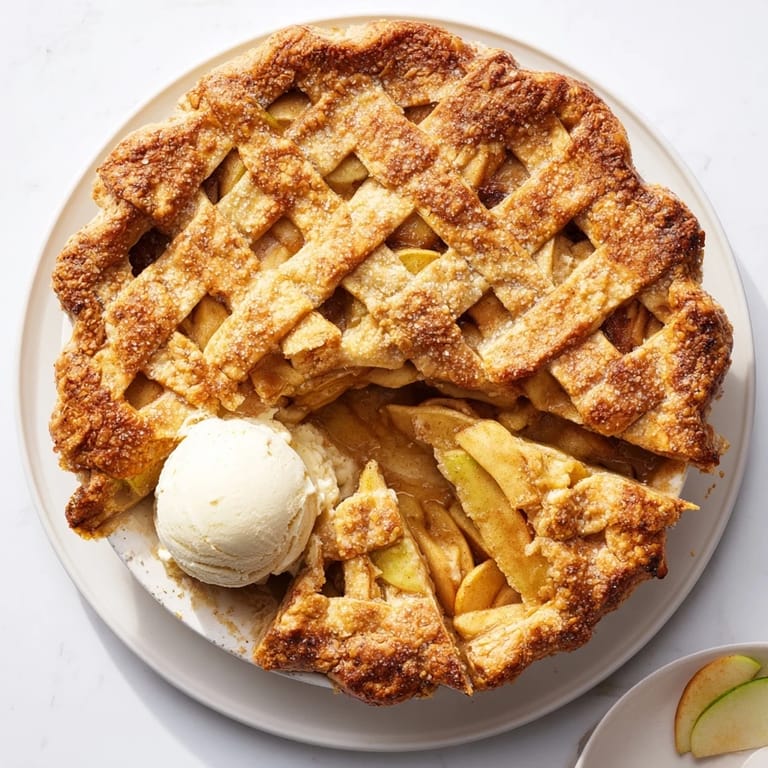
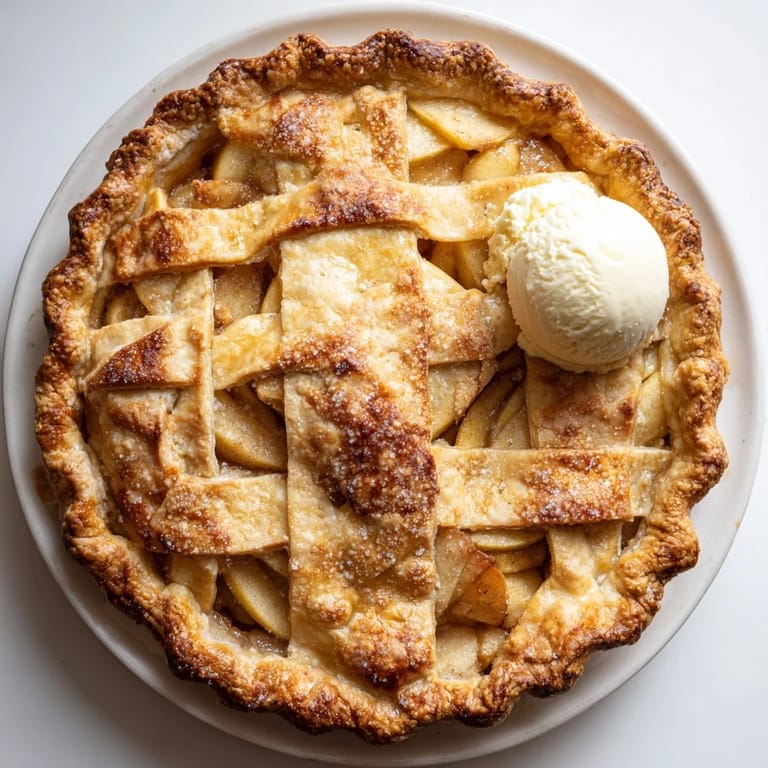
- Mix the beaten egg with milk and brush it over the entire top crust. Sprinkle with coarse sugar if you want that extra sparkle and crunch. Bake at 400°F on the lower oven rack for forty-five to fifty-five minutes, until the crust is deep golden and you can see the filling bubbling through the vents.
 Save
Save Last Christmas Eve, I made three of these pies and my brother stood by the counter eating the apple slices I had trimmed off the ends. By the time the pies came out of the oven, he had consumed almost two entire apples worth of scraps and claimed it was the best part of the process.
Choosing Your Apples
The apple selection matters more than most people realize. I have used only Granny Smith and ended up with a pie that was pleasantly tart but lacked sweetness. Using only sweet apples produces a pie that tastes nice but has no complexity. The combination approach gives you the best of both worlds.
Temperature Matters
Everything that touches your butter needs to be cold. I put my mixing bowl in the freezer for ten minutes before starting, use ice water from the fridge, and work quickly once the butter comes out of the refrigerator. Warm butter creates a tough, mealy crust instead of the flaky layers you are after.
Serving Suggestions
Apple pie is excellent at room temperature but becomes something else entirely when warmed. I heat leftover slices in a 300°F oven for about ten minutes. This brings back some of the crispness to the bottom crust and makes the flavors pop again.
- A scoop of vanilla bean ice cream will melt into the warm crevices
- Aged cheddar cheese sliced thin creates a sweet and salty contrast
- Whipped cream with a pinch of cinnamon adds lightness
 Save
Save There is something deeply satisfying about serving a homemade pie to people you care about. The work you put into it shows, not just in how it looks, but in how it tastes.
Recipe FAQs
- → What apples work best for pie filling?
A mix of Granny Smith and Honeycrisp apples provides the ideal combination. Granny Smiths offer tartness and hold their shape during baking, while Honeycrisps add natural sweetness and tender texture. You can also use Braeburn, Jonagold, or Pink Lady varieties.
- → Why must the dough be chilled before rolling?
Chilling the dough for at least one hour allows the gluten to relax, making it easier to roll out without shrinking. It also firms up the butter, which creates flaky layers as the pie bakes. Skip this step and you'll end up with a tough, chewy crust.
- → How do I prevent a soggy bottom crust?
Bake the pie on the lower oven rack position to ensure the bottom crust cooks thoroughly. The high initial temperature of 400°F helps set the crust quickly. Also, let the filling sit for 10 minutes after tossing so the apples release some liquid before assembly.
- → Can I make this pie ahead of time?
Absolutely. You can prepare the dough up to 2 days in advance and keep it refrigerated. The assembled but unbaked pie can be covered and refrigerated overnight—just add a few extra minutes to the baking time. Fully baked pies keep well at room temperature for 2 days.
- → Why is my apple pie runny?
Runny filling usually means the apples weren't given time to release their juices, or the pie wasn't baked long enough. The flour in the filling helps thicken the juices as they bubble. Always look for active bubbling through the vents before removing the pie from the oven.
- → Should I peel the apples?
Yes, peeling is recommended for the best texture. Apple skins can become tough and chewy after baking, detracting from the tender filling. Use a vegetable peeler or sharp knife to remove the skins before slicing the apples into uniform 1/4-inch pieces.