 Save
Save My nephew once called these "the fancy ones" because of the chocolate layer, and honestly, that stuck with me. I started making them for every school bake sale after that, watching kids choose mine over the plain bars every single time. The chocolate adds just enough richness without stealing the show from that signature crispy-marshmallow chew. They disappear faster than I can box them up, and I've learned to double the batch without even thinking twice.
I brought a tray of these to a potluck once, and my friend's toddler stood guard by the table, warning people they were "almost gone." That protective instinct over a dessert told me everything. I've since made them for birthday parties, baby showers, and even a coworker's retirement lunch. Each time, someone asks for the recipe, and I love how something this simple sparks that kind of excitement.
Ingredients
- Unsalted butter: Melts the marshmallows smoothly and adds a subtle richness that balances the sweetness, plus you control the salt level.
- Mini marshmallows: Melt faster and more evenly than the large ones, creating that signature gooey binder without hot spots.
- Rice Krispies cereal: The star texture, light and airy, giving you that satisfying snap with every bite.
- Fine sea salt: Optional but magic, it cuts through the sweetness just enough to keep things interesting.
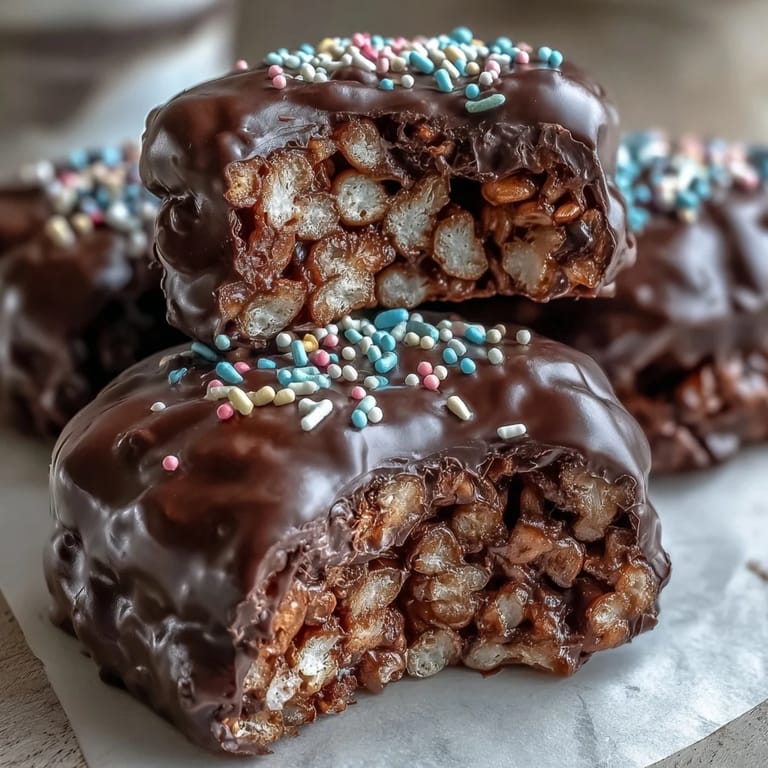
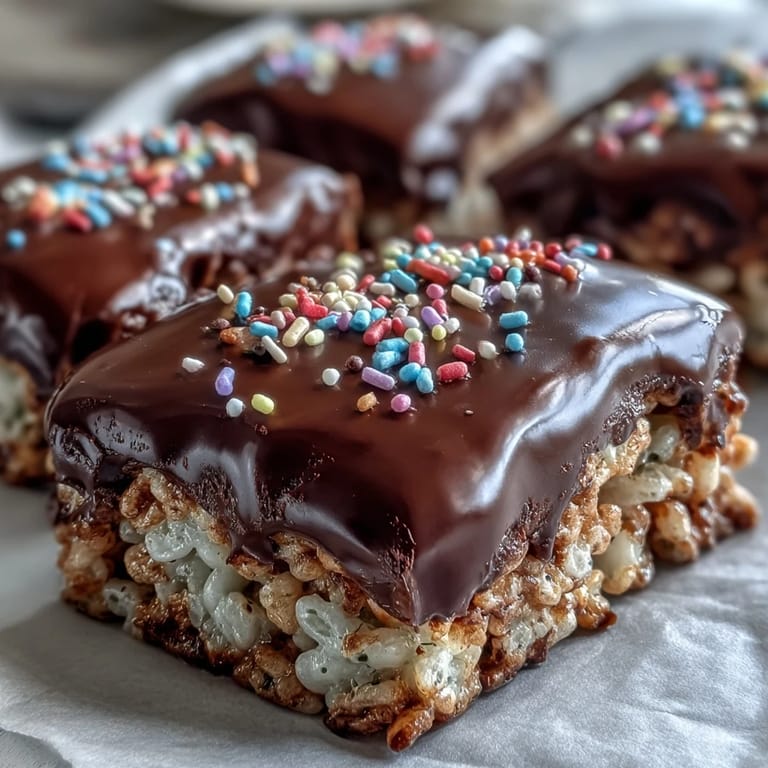
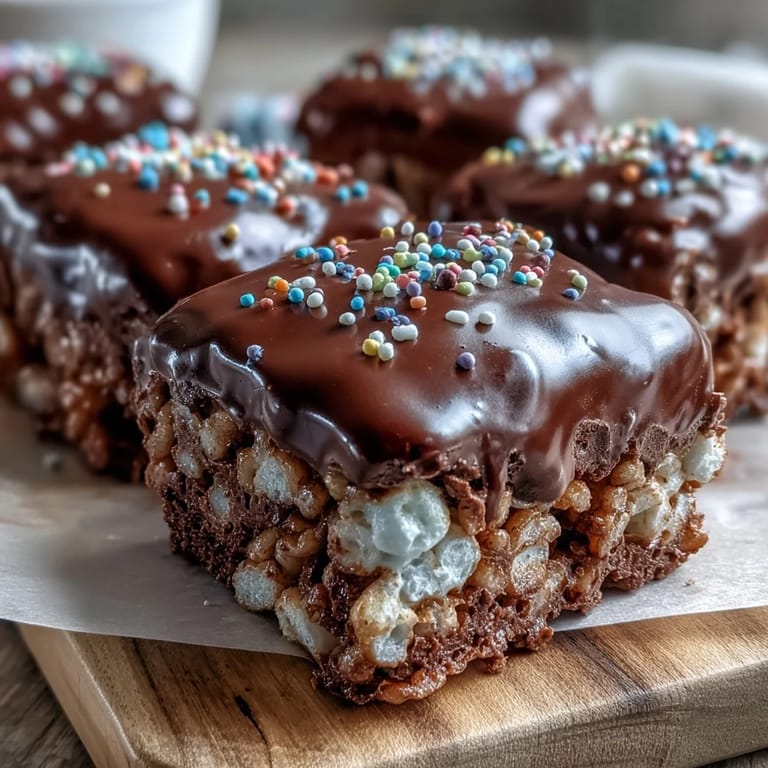
- Semisweet or dark chocolate chips: Your topping game changer, choose based on how sweet or intense you want the finish.
- Vegetable oil or coconut oil: Thins the chocolate slightly so it spreads like silk and sets with a gentle sheen.
- Rainbow sprinkles or chopped nuts: Pure joy in edible form, they add color, crunch, or both depending on your mood.
Tired of Takeout? 🥡
Get 10 meals you can make faster than delivery arrives. Seriously.
One email. No spam. Unsubscribe anytime.
Instructions
- Prep the pan:
- Grease your square pan generously so the bars lift out cleanly later. If you line it with parchment, leave some overhang for easy removal.
- Melt the butter:
- Keep the heat low and stir constantly so the butter doesn't brown or separate. You want it liquid and warm, not sizzling.
- Add marshmallows:
- Toss them in and keep stirring until they melt into a glossy, smooth pool with no lumps. It takes a few minutes, so be patient and watch the magic happen.
- Season the base:
- Stir in the sea salt if you're using it, and mix well. This is also when you'd add vanilla extract if you want that extra layer of warmth.
- Fold in cereal:
- Pour in the Rice Krispies and use a gentle folding motion so you don't crush them. Every piece should be coated in marshmallow without turning into mush.
- Press into pan:
- Transfer the mixture while it's still warm, then use a buttered spatula or your hands to press it firmly and evenly. Don't leave gaps or the bars will fall apart later.
- Cool briefly:
- Let it sit for about 10 minutes at room temperature so the base sets enough to hold the chocolate. You want it firm but not cold.
- Melt the chocolate:
- Combine chocolate chips and oil in a microwave safe bowl, then heat in 30 second bursts, stirring after each. Stop when it's smooth and glossy, not grainy or overheated.
- Pour and spread:
- Drizzle the melted chocolate over the cooled base, then use an offset spatula or spoon to spread it evenly from edge to edge. Work quickly before it starts to set.
- Add toppings:
- Sprinkle on your rainbow bits or nuts right away while the chocolate is still wet. They'll stick perfectly and add that final pop of color or crunch.
- Let it set:
- Leave the pan at room temperature for at hour, or pop it in the fridge for 20 to 30 minutes if you're in a hurry. The chocolate should be firm to the touch before cutting.
- Cut into bars:
- Use a sharp knife and wipe it clean between cuts for neat edges. If the chocolate cracks, let it warm up slightly and try again.
 Save
Save The first time I made these, my daughter walked into the kitchen, saw the chocolate layer, and said they looked like something from a bakery window. That little comment made me realize how a small upgrade can shift the whole vibe of a dish. Now, whenever I need something that feels special but doesn't require hours of work, these are my go to.
Storing Your Treats
I stack them in an airtight container with parchment between layers so the chocolate doesn't stick. At room temperature, they stay perfect for up to three days, and in the fridge, they last a full week. I've even frozen a batch once, and they thawed beautifully without losing that crispy texture. Just let them come to room temperature before serving so the chocolate isn't too hard.
Flavor Twists
White chocolate with pastel sprinkles turns these into an instant Easter or baby shower hit. I've also stirred mini chocolate chips into the cereal mixture before pressing, giving you pockets of melty chocolate inside. A drizzle of peanut butter melted with the chocolate creates a Reese's vibe that my husband requests constantly. The base recipe is so flexible that you can riff on it without worrying about ratios or science.
Serving Ideas
I love cutting these into small squares for dessert platters alongside brownies and cookies. They also work as party favors when wrapped individually in clear cellophane with a ribbon. For a fun twist, I've served them with vanilla ice cream on the side, letting the cold cream melt into the warm chocolate if you heat them slightly.
- Dust with powdered sugar for a snowy, elegant finish at winter gatherings.
- Use holiday themed sprinkles to match any occasion without changing the recipe.
- Pair with coffee or cold milk for a nostalgic after school snack vibe that adults love too.
 Save
Save These bars prove that a little chocolate can turn a childhood favorite into something you're proud to serve at any table. Make a batch, watch them vanish, and enjoy knowing you pulled off something this good with almost no effort.
Recipe FAQs
- → Why add oil to the melted chocolate?
The vegetable or coconut oil helps the chocolate achieve a smooth, glossy consistency and prevents it from seizing. It also creates a softer snap when the chocolate sets, making the bars easier to bite through without the chocolate cracking excessively.
- → Can I use white chocolate instead?
Absolutely. White chocolate creates a stunning contrast and pairs beautifully with the cereal base. White chocolate may set slightly softer than dark chocolate, so consider chilling the treats for an extra 10-15 minutes for a firmer finish.
- → How do I prevent sticky marshmallow hands?
Lightly butter your hands, spatula, or the parchment paper before pressing the cereal mixture into the pan. The butter creates a non-stick surface and ensures even compression without the gooey marshmallow pulling apart or sticking to everything.
- → What's the best way to cut clean squares?
Let the chocolate set completely at room temperature or briefly refrigerate until firm. Use a sharp knife warmed under hot water and wiped dry between cuts. Press down firmly in one motion rather than sawing back and forth for the cleanest edges.
- → Can I make these ahead of time?
These treats store beautifully in an airtight container at room temperature for up to 3 days, or refrigerated for up to a week. The chocolate may develop a slight bloom from humidity, but this doesn't affect taste or texture. Layer between parchment to prevent sticking.
- → Why press the mixture firmly into the pan?
Firm compression ensures the bars hold their shape when cut and creates a dense, satisfying texture. Loose pressing results in crumbly pieces that fall apart. A buttered spatula or hands help press evenly without sticking.